MTH: Passenger Car Modifications
page:
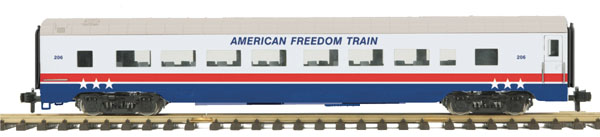
________________________________________________________________________________
MTH Passenger Car Modifications:
Modifications/Topics list:
________________________________________________________________________________
05/24/16
Kadee
coupler: Install body mounted Kadee coupler 789:
To install body
mounted Kadee couplers is very straight forward. First, unscrew the
existing MTH coupler arm that is bolted to the truck (2 screws).
(It is recommended
to screw the screws back into their spots after removing the arm in case you
need to use them again later.)
Next, position the
assembled 789 Kadee coupler as desired. Drill holes as necessary.
You will be able to use the provided screws in the 789 package to bolt to the
frame. The inside end of the coupler will require some shimming so use one
or more washers for level mounting of the coupler body.
You will be able to
allow for very close coupling of the cars with this coupler and in this position
and may want to do some tests that you can run the cars on your diameter curves
before doing all the cars. (Be sure to test by backing up the consist.)
Finished result.
________________________________________________________________________________
07/17/08
Turn your MTH Passenger car into a track cleaning car:
Keeping with my practice of having one car per
consist setup as a track cleaner to ensure the track rail tops stay perfectly clean, I
reworked one of my MTH Passenger Cars to add track cleaner pads on one of the
trucks.
I've found the easiest way to add track
cleaner pads to any truck is to cut some properly sized pieces of wood and hot
glue them to the bottom of the truck between the wheels. I make sure I
paint them black before installing them to ensure they stay masked from view.
Once the blocks are glued in place, I then apply a strip of this Scotch outdoor
double-stick tape to hold the finishing pads in place.
I use 3M finishing pads for the cleaner pads and have found these
work best compared to some other brands I've used. If you can't find them
at your local hardware store, I ordered a big box from
www.acehardwareoutlet.com - (Item
# 17672).
Photos of the installed cleaner pads:
You will need to periodically replace the pads. All you do
is pull the finishing pad and adhesive off and apply new.
__________________________________________________________________________________
07/26/08
Adding Light
on/off switch, Polyfuses and Inductors:
The MTH Passenger cars I purchased (American Freedom and
Daylight) were first production runs and did not come with on/off switches for
the lights as later runs did. Since I prefer to have the lights off during
the day I decided to add a light switch to each car and also add resettable
polyfuses to protect from accidental shorts that might occur. (see
http://www.rayman4449.com/Aristocraft_Heavyweight_Polyfuse.htm for
more info) In my case I also added inductors to the pos and neg wires to
eliminate the reductions in track signal on my digital control system.
To start, I removed the top of the car by
removing the screws holding it down. (accessed through the bottom) I then
cut the pos and neg wires that run to the power transfer post that provides
power to the roof wiring. At the end of each of these four wires (that run
to the trucks) I added a single polyfuse to protect against shorts.
Source
for the fuses:
http://www.allelectronics.com/make-a-store/item/RXE-065/RESETTABLE-CIRCUIT-PROTECTOR-0.65-1.3-AMP/-/1.html
From there, I then added the selected the switch and added two
inductors (Choke Coils), one to each center post. (This is where the power
wires will be run to the overhead lights) (I added heat shrink to the
inductors.) The wires with the poly fuses are added to one side of the
switch terminals. (two per terminal - two left rail pickup wires on one
terminal and two right rail pickup wires on the other.
Next, I selected where I wanted the switch to be but still fit
the switch with inductors and polyfuses. The formed tank on the bottom of
the car worked perfectly. I drilled out a slot for the switch head and the
screws.
When you're finished this is what it should look like.
Instructions for Observation Cars:
The first run observation cars did already come with light
switches. The only thing I wanted to add was inductors and polyfuses to
protect against shorts.
The voltage control board is located in the rounded bar area.
Once you remove the floor you can get access to it.
The red and black wires that run to the left bottom side of the
board are the power feeder wires to the board. I removed the wires from
the board and added one inductor to each location in the board. I then
added two polyfuses per wire end (only one each are pictured) and wired the
other end of the polyfuse to the inductor. I then reinstalled the board
and reassembled the car.
__________________________________________________________________________________
Return to Garden Railroad
Modification page.
Web Counter


